My Router - Part 5
Guest WiFi and Captive Portals
We’re going to set up our Guest wifi, as well as NoDogSplash as our captive portal. As a bonus, we will replace the boring (IMHO) splash page for something more modern and interesting…
Let’s get to it!
Guest Wifi
We need to create new guest network interface br-guest:
1
2
3
4
5
6
7
8
9
10
11
12
13
uci -q delete network.guest_dev
uci set network.guest_dev="device"
uci set network.guest_dev.type="bridge"
uci set network.guest_dev.name="br-guest"
uci set network.guest_dev.bridge_empty='1'
uci -q delete network.guest
uci set network.guest="interface"
uci set network.guest.proto="static"
uci set network.guest.device="br-guest"
uci add_list network.guest.ipaddr='192.168.3.1/24'
uci add_list network.guest.dns='192.168.3.1'
uci commit network
service network restart
Next, we need to configure our wireless interfaces for the guest Wifi. I am going to set up a 2.4GHz guest access point called Nacho Wifi. Note that it is disabled at this point.
1
2
3
4
5
6
7
8
9
10
11
WIFI_DEV="$(uci get wireless.@wifi-iface[0].device)"
uci -q delete wireless.guest
uci set wireless.guest="wifi-iface"
uci set wireless.guest.device="${WIFI_DEV}"
uci set wireless.guest.mode="ap"
uci set wireless.guest.network="guest"
uci set wireless.guest.ssid="Nacho Wifi"
uci set wireless.guest.encryption="none"
uci set wireless.guest.isolate='1'
uci set wireless.guest.ifname='wguest-24g'
uci set wireless.guest.disabled='1'
We also will set up a 5GHz guest access point called Nacho Wifi 5GHz. Note that it is disabled at this point.
1
2
3
4
5
6
7
8
9
10
11
WIFI_DEV="$(uci get wireless.@wifi-iface[1].device)"
uci -q delete wireless.guest2
uci set wireless.guest2="wifi-iface"
uci set wireless.guest2.device="${WIFI_DEV}"
uci set wireless.guest2.mode="ap"
uci set wireless.guest2.network="guest"
uci set wireless.guest2.ssid="Nacho Wifi 5GHz"
uci set wireless.guest2.encryption="none"
uci set wireless.guest2.isolate='1'
uci set wireless.guest2.ifname='wguest-5ghz'
uci set wireless.guest2.disabled='1'
We need to commit the changes and reload the wifi configuration:
1
2
uci commit wireless
wifi reload
We need to create a DHCP pool for our new guest wifi. It starts at 192.168.3.100 thru 192.168.3.250. Restarting DNSMASQ is necessary once completed.
1
2
3
4
5
6
7
8
9
10
11
12
uci -q delete dhcp.guest
uci set dhcp.guest="dhcp"
uci set dhcp.guest.interface="guest"
uci set dhcp.guest.start="100"
uci set dhcp.guest.limit="150"
uci set dhcp.guest.leasetime="1h"
uci add_list dhcp.guest.dhcp_option='3,192.168.3.1'
uci add_list dhcp.guest.dhcp_option='6,192.168.3.1'
uci add_list dhcp.guest.dhcp_option='42,192.168.3.1'
uci set dhcp.guest.force="1"
uci commit dhcp
service dnsmasq restart
I’m specifying DHCP option 3 to specify the router’s Default Gateway, option 6 to specify the DNS servers, and option 42 to specify the Network Time Protocol servers.
Default firewall for the “guest” zone is to reject input and forwarded packets, and allow output packets.
1
2
3
4
5
6
7
uci -q delete firewall.guest
uci set firewall.guest="zone"
uci set firewall.guest.name="guest"
uci set firewall.guest.network="guest"
uci set firewall.guest.input="REJECT"
uci set firewall.guest.output="ACCEPT"
uci set firewall.guest.forward="REJECT"
We will allow forwarding between the guest network and WAN:
1
2
3
4
uci -q delete firewall.guest_wan
uci set firewall.guest_wan="forwarding"
uci set firewall.guest_wan.src="guest"
uci set firewall.guest_wan.dest="wan"
We have to always allow DNS requests, because otherwise any guest internet access to useless without the ability to resolve DNS queries:
1
2
3
4
5
6
7
uci -q delete firewall.guest_dns
uci set firewall.guest_dns="rule"
uci set firewall.guest_dns.name="Allow-DNS-Guest"
uci set firewall.guest_dns.src="guest"
uci set firewall.guest_dns.dest_port="53"
uci set firewall.guest_dns.proto="tcp udp"
uci set firewall.guest_dns.target="ACCEPT"
We also have to always allow DHCP requests, because otherwise clients have to set their static IP addresses. Life is difficult enough: we don’t want our guests to have to do this!
1
2
3
4
5
6
7
8
uci -q delete firewall.guest_dhcp
uci set firewall.guest_dhcp="rule"
uci set firewall.guest_dhcp.name="Allow-DHCP-Guest"
uci set firewall.guest_dhcp.src="guest"
uci set firewall.guest_dhcp.dest_port="67"
uci set firewall.guest_dhcp.proto="udp"
uci set firewall.guest_dhcp.family="ipv4"
uci set firewall.guest_dhcp.target="ACCEPT"
Lastly, I want to be able to access devices on the guest network from the LAN network, but not the other way around. You know, for the sake of Network Security:
1
2
3
uci set firewall.lan_guest="forwarding"
uci set firewall.lan_guest.src='lan'
uci set firewall.lan_guest.dest='guest'
We need to commit changes and restart firewall:
1
2
uci commit
service firewall restart
Captive Portal
Nodogsplash is a Captive Portal that offers a simple way to provide restricted access to the Internet by showing a splash page to the user before Internet access is granted.
Let’s install it!
1
apk add nodogsplash
We need to change the gateway interface from br-lan to br-guest. Otherwise, the captive portal will be on the main network, and this will drive everybody crazy! Restarting the service is necessary once completed:
1
2
sed -i "s|option gatewayinterface .*|option gatewayinterface 'br-guest'|" /etc/config/nodogsplash
service nodogsplash restart
Now, when we go to http://openwrt.lan:2050/, we see this (IMHO) ugly page: 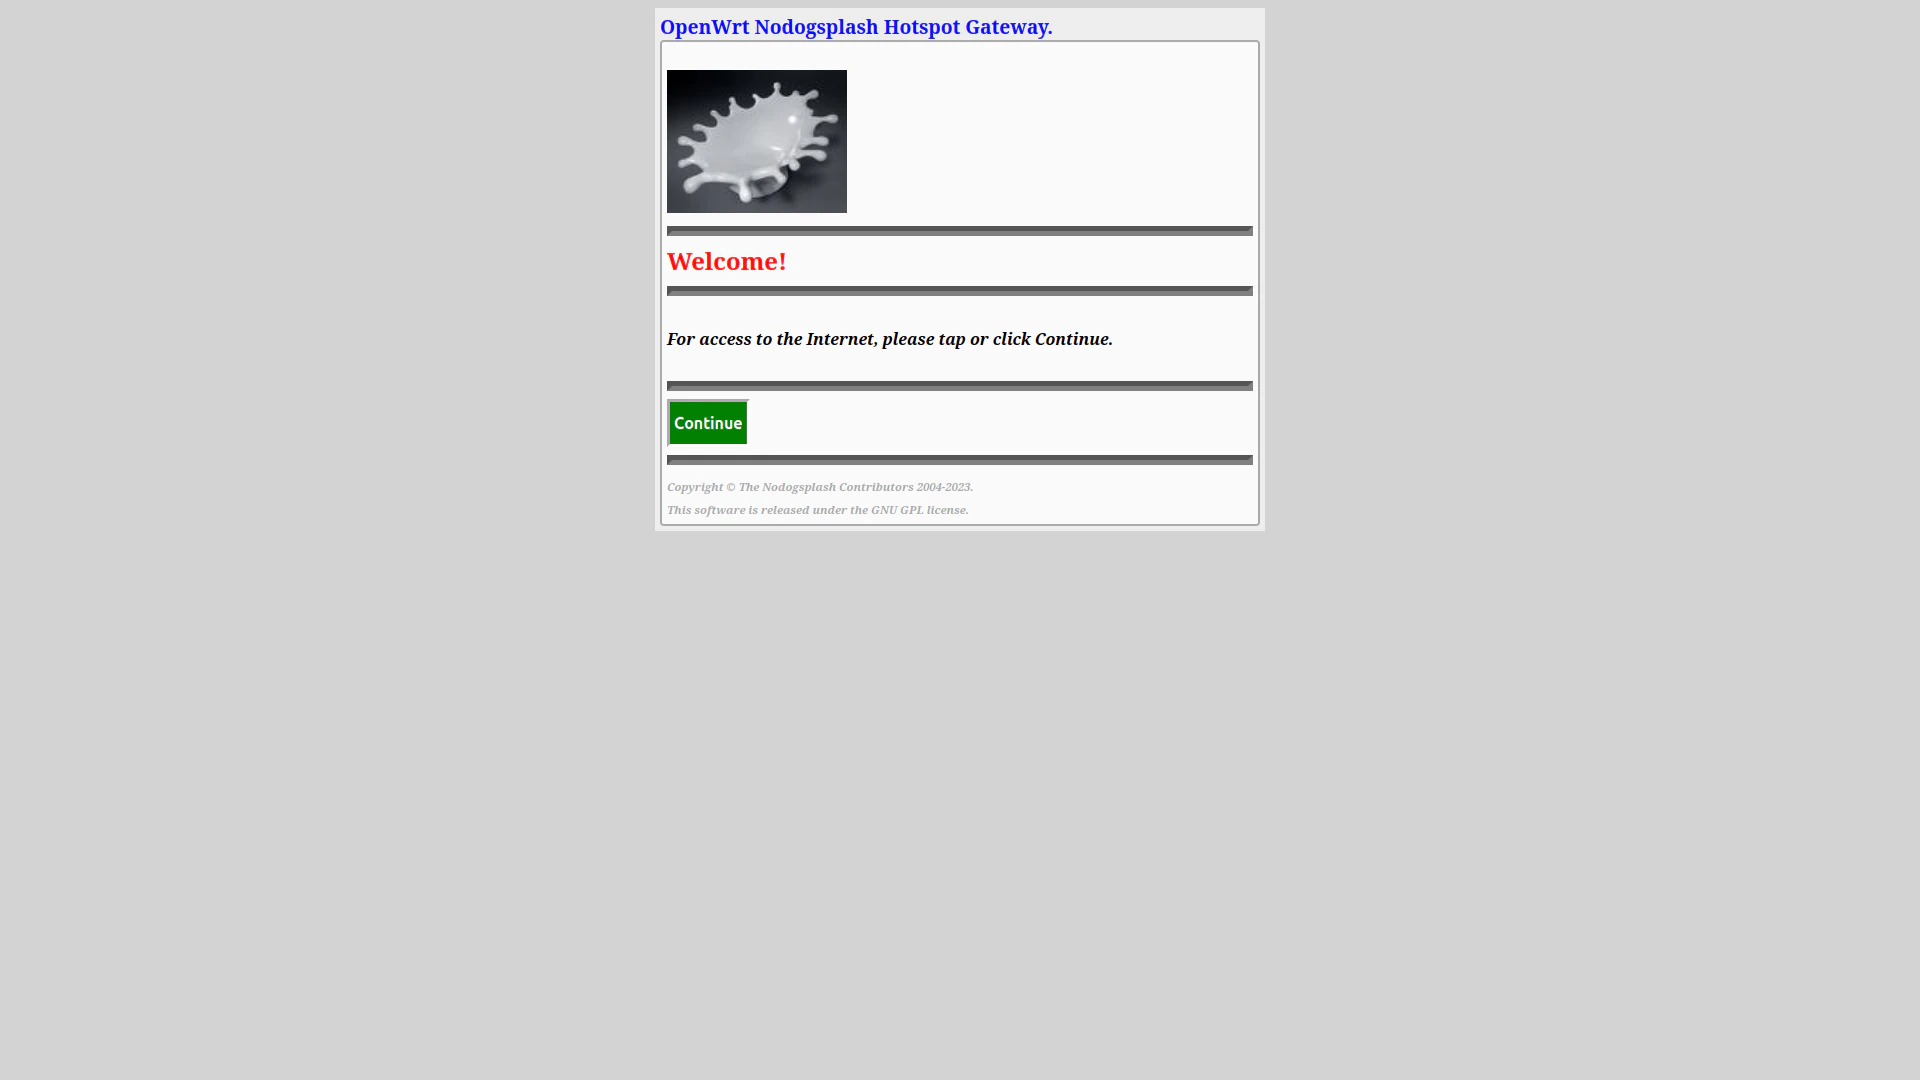 This page is ugly and basic. Then again, maybe that’s what the author was going for. Who knows…. Let’s replace it:
1
2
3
FILE=/etc/nodogsplash/htdocs/splash.html
wget https://xptsp.github.io/assets/files/splash.template -O ${FILE}
echo "${FILE}" >> /etc/sysupgrade.conf
Now we get this: 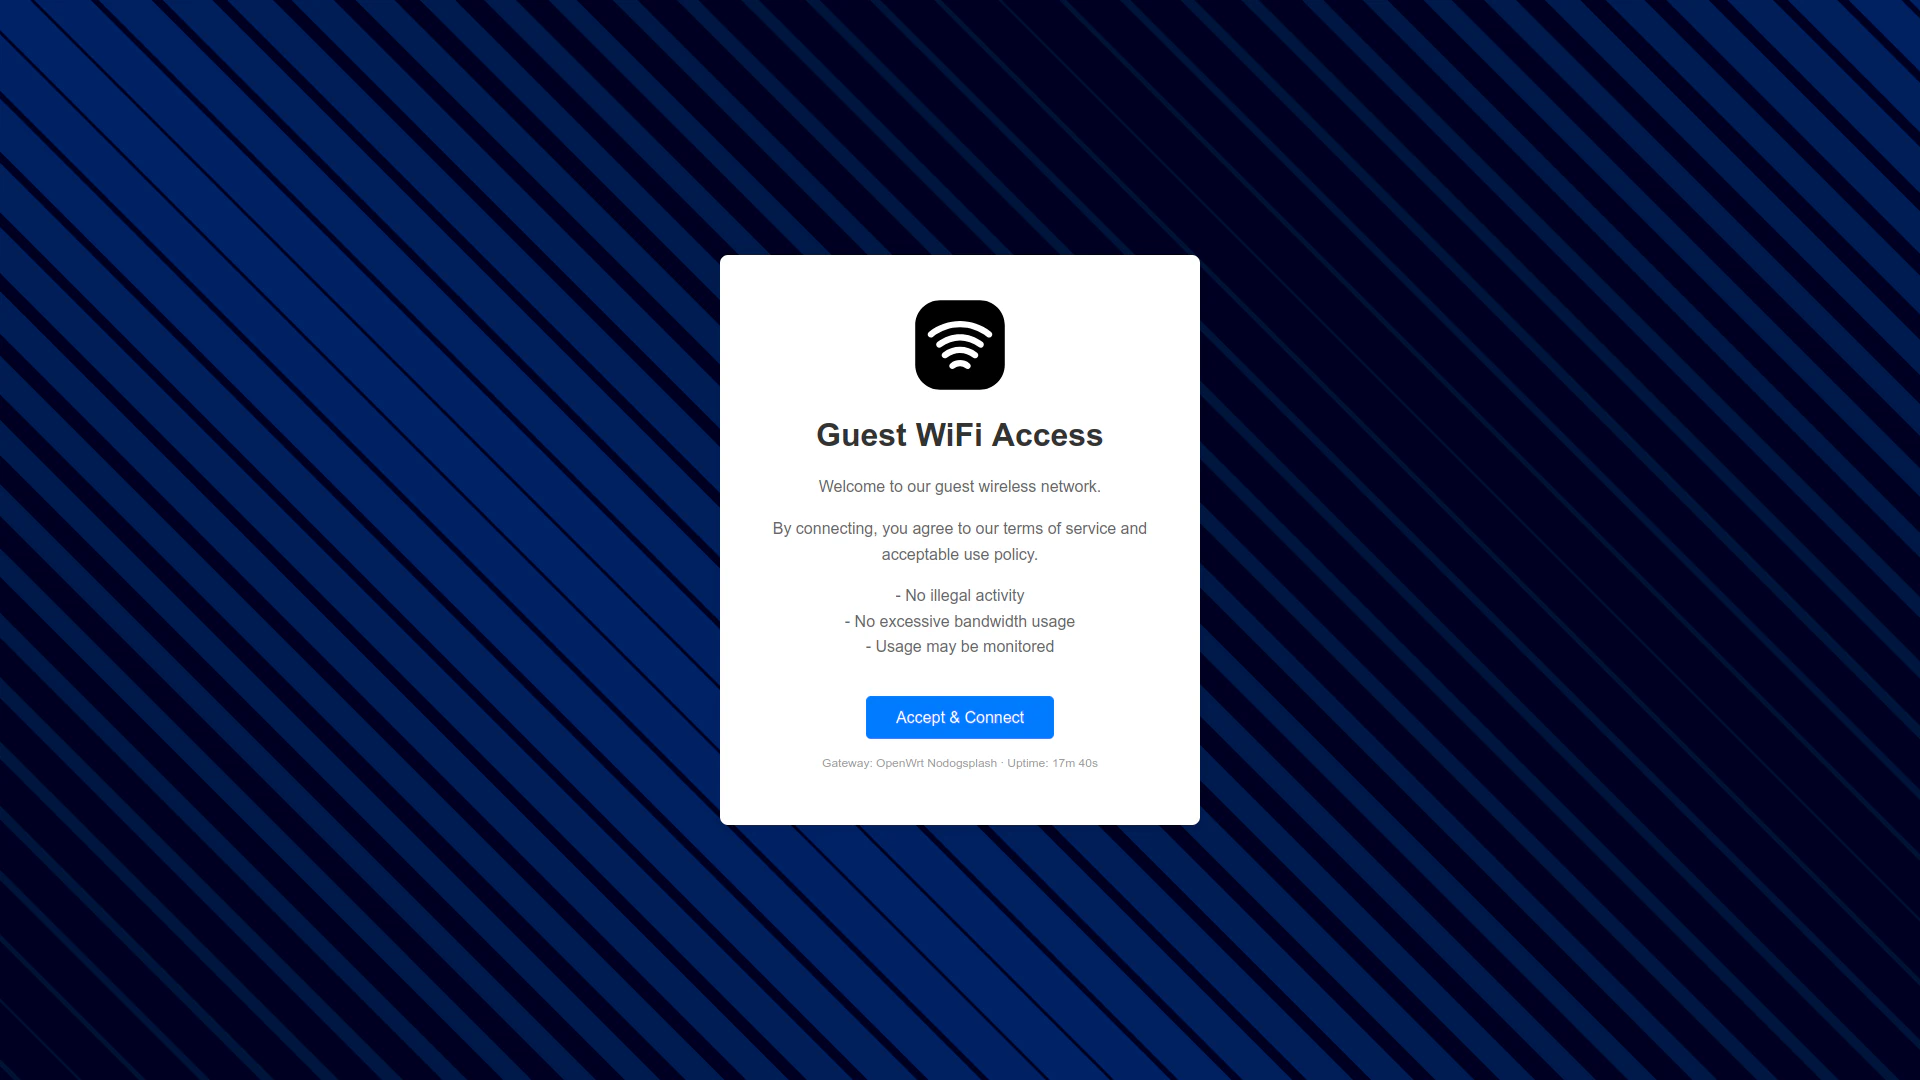 IMHO, much better! Naturally, the background and wifi symbol image is a SVG image, so replacing it in the
 splash.html is rather easy to do. I got my background SVG file from SVG Backgrounds.
You can customize this splash page to suit your needs, if desired. Keep in mind that some devices will not allow you to pull JS, CSS or images from the web server, so it is best to have everything in one file to serve to the client.
Eventually, I’ll explore how to do authenticated access through the captive portal. I don’t think it’ll be hard to do, but I haven’t worked on that aspect yet….
Summary
We have set up our Guest Wifi access points, plus a nifty looking captive portal!
Pretty sure we can still add things to our router! Onwards to Part 6!