My NAS - Intro
Introduction and the Image Builder
This page was updated to reflect that I’m running OpenWRT 25.12.5, not 24.10.8.
The Purchase
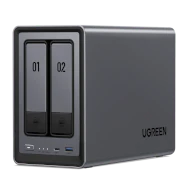
Last year, I purchased a UGREEN NAS DXP2800 2-Bay. I needed a NAS device and had explored other devices with display outputs, failing miserably. I finally found this devices and fell in love with it, so I ordered it.
My Problem
I tried the software for a few minutes. Vastly confusing for me, but I am used to running Ubuntu and OpenWRT. I decided that I didn’t want to use the onboard OS. Is there anything wrong with the software? I dunno, probably didn’t explore long enough. But I decided that I don’t really trust the software, which may be perfectly fine and dandy; but for me, this is a MAJOR issue. Luckily, it is an issue which I can resolve by myself…
The Goal
Every install I’ve got has been on a BTRFS filesystem, with TimeShift creating snapshots so I can easily restore back to a predefined state. And every install had the same problem: a seperate boot partition that doesn’t get backed up properly.
I need an Operating System that I can restore quickly, as both me and my wife gets irritated quickly when our NAS breaks… Services go down, WAF drops drastically. I really can’t blame her. It’s frustrating when I can’t fix things quickly, and these “breaks” typically aren’t minor….
First Attempt
One of the reasons I bought this NAS is because I could install my own OS. I disabled the onboard EMMC and installed a NVMe SSD, then installed 2 different operating systems (over time, not at once :p )….
The first operating system I tried was Debian 12 with OpenMediaVault. No graphic UI possible, since OMV conflicts with everything GUI…. I was okay with it, for a while…. Once you got used to OMV, it was okay. IMHO, a bit too much software, a bit too complex…
Sadly, that install somehow got damaged by a TimeShift snapshot restore and I had to attempt a reinstall, which proved damn near impossible to get right.
Second Attempt
I installed Ubuntu, reasoning that I might need a graphic UI. That need has rarely occurred… It’s better, but I feel like I can do better somehow…
This Attempt
This attempt leaverages OpenWRT as the operating system, since it has a squashfs partition, paired with an overlay that can be wiped. This feels like the ideal method of solving the “quick restore” problem, since the squashfs partition ABSOLUTELY cannot be modified without using the OpenWRT Image Builder…
Doing this also gives me an admin panel that I’m used to, since I’ve been working with OpenWRT on my LinkSys router that I flashed…
The Expected Destination
By the end of this series, we will have customized our installation of OpenWRT 25.12.5 for this NAS, then created and flashed our custom firmware to flash to it. This will enable us to reset to our defaults easily (as opposed to the unmodified firmware defaults), in the event we screw something up royally (which I’ve done WAY too many times)…
We expect to have the front LEDs and fan work as expected, and maybe even control them in LuCI. RAID and encrypted partitions would be nice, as well as a working partition manager from within LuCI. Docker support is expected, as well.
Unfortunately, OpenWRT 24.10.8 is being used instead of 25.12.5 because it is lacking Docker packages so this is not possible at the time of this writing….
The Image Builder
Let’s start by downloading the Image Builder for OpenWRT 24.12.8 and unpacking it, renaming the resulting directory to openwrt_25.12:
1
2
3
4
5
wget https://downloads.openwrt.org/releases/25.12.5/targets/x86/64/openwrt-imagebuilder-25.12.5-x86-64.Linux-x86_64.tar.zst
tar xfv openwrt-imagebuilder-25.12.5-x86-64.Linux-x86_64.tar.zst
rm openwrt-imagebuilder-25.12.5-x86-64.Linux-x86_64.tar.zst
mv openwrt-imagebuilder-25.12.5-x86-64.Linux-x86_64 openwrt_25.12
cd openwrt_25.12/
Now that we are inside the image builder directory, we need to download the build script and make it executable:
1
2
wget https://xptsp.github.io/assets/files/build.script_x64 -O build
chmod +x build
Let’s install the XPtsp OpenWRT repository keys and package location:
1
2
3
echo "https://xptsp.github.io/openwrt-repo/apk/all/packages.adb" >> repositories
echo "https://xptsp.github.io/openwrt-repo/apk/x86_64/packages.adb" >> repositories
wget http://xptsp.github.io/openwrt-repo/apk/xptsp.pem -O keys/xptsp.pem
We need to make minor changes to the .config file. I’m not interested in ext4 images, I need more space than the 110mb provided by default, and I need to customize the GRUB menu slightly. Here are the commands used:
1
2
3
4
sed -i "s|CONFIG_TARGET_ROOTFS_EXT4FS=.*|CONFIG_TARGET_ROOTFS_EXT4FS=n|g" .config
sed -i "s|CONFIG_TARGET_ROOTFS_PARTSIZE=.*|CONFIG_TARGET_ROOTFS_PARTSIZE=513|g" .config
sed -i "s|CONFIG_GRUB_TIMEOUT=.*|CONFIG_GRUB_TIMEOUT=\"1\"|g" .config
sed -i "s|CONFIG_GRUB_TITLE=.*|CONFIG_GRUB_TITLE=\"HomeLab\"|g" .config
Setting up History of Images Built
I’ve found this to be useful for myself, in the event that I’ve screwed something up. You can skip making a repository on GitHub (or Gitea or any other Git system) if this doesn’t interest you. It should though….
Let’s start by installing git on your system. I am assuming that you are using a Debian-based OS, so if this isn’t correct, adjust for your OS! (Windows is not supported!)
1
apt install -y git
Additional Scripts
We need to create a file called files_overwrite/etc/uci-defaults/99-custom:
1
2
3
4
5
6
7
8
#!/bin/bash

# Make sure dropbear directories permissions are correct:
chmod -R u=rwX,go= /etc/dropbear

# Make sure /root directory permissions are correct:
chmod 0600 /root
chmod 0600 /root/.ssh
First Commit
Before we do anything else, let’s create the first commit:
1
2
3
4
5
6
7
ln -sf build_dir/target-x86_64_musl/linux-x86_64/tmp image
mkdir -p build_dir/target-x86_64_musl/linux-x86_64/tmp
touch build_dir/target-x86_64_musl/linux-x86_64/tmp/.hidden
git init
git checkout -b main
git add .
git commit -m "Initial Commit"
Now, this is almost perfect, except there are certain directories that we don’t NEED in the repo. We REALLY don’t need to backup anything in the build_dir and dldirectories. So let’s create a .gitignore file and amend the commit with it:
1
2
3
{ echo "/build_dir"; echo "/dl"; } > .gitignore
git add ./.gitignore
git commit --amend --no-edit
Finally, we can push the commit to the Git repository. I have a Gitea container setup already set up, so I’m going to push it there:
1
2
git remote add origin https://doug:MySuperSecretPassword@gitea.example.com/Doug/Builder-x64.git
git push -u origin main
Now we have a backup, just in case something happens.
Future Commits
Once OpenWrt is installed on the NAS, then creating a firmware image with our modifications is as easy as executing the following command:
1
./build
The script contacts the OpenWrt installation, gets the sysupgrade backup, unpacks it, applies any files found in the files_overwrite directory, and proceeds to build the firmware image. The resulting image can be flashed from within the LUCI Web UI, or by uploading it to the router and executing sysupgrade <IMAGE>.
Summary
We’re ready to install OpenWRT for the first time on the NAS!! How exciting!