My Router - Intro
Introduction and the Image Builder
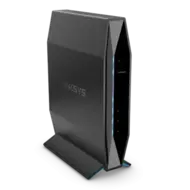
The Purchase
About 3 years ago, I purchased a Linksys E8450 Router from Amazon. I did my research and decided on this router because it was upgradable to OpenWrt. Looked easy enough to upgrade… Nervous as hell, though. After getting brave enough to modify my new toy, I executed the OpenWRT upgrade instructions. I will not duplicate these instructions, as the linked page contains everything that is needed to upgrade this router to OpenWRT. It is also meant to be done only once per device, and mine has been done the first time for many years, and again to upgrade to 24.10….
I’ve also documented the changes I’ve made to my OpenWrt installation, and this series is meant to reflect the documentation I’ve made.
The Expected Destination
By the end of this series, we will have customized our installation of OpenWRT 25.12.5 for this router, then created and flashed our custom firmware to flash to it. This will enable us to reset to our defaults easily (as opposed to the unmodified firmware defaults), in the event we screw something up royally (which I’ve done WAY too many times)…
Our Image Builder
We need to download the image builder for OpenWRT 25.12.5 for the Linksys E8450 router. It’s a hefty file, weighing in at 119,211 KB (116 MB), so be patient!
1
2
3
4
5
wget https://downloads.openwrt.org/releases/25.12.5/targets/mediatek/mt7622/openwrt-imagebuilder-25.12.5-mediatek-mt7622.Linux-x86_64.tar.zst
tar xfv openwrt-imagebuilder-25.12.5-mediatek-mt7622.Linux-x86_64.tar.zst
rm openwrt-imagebuilder-25.12.5-mediatek-mt7622.Linux-x86_64.tar.zst
mv openwrt-imagebuilder-25.12.5-mediatek-mt7622.Linux-x86_64 Builder
cd Builder
Now that we are inside the image builder directory, we need to download the build script and make it executable:
1
2
wget https://xptsp.github.io/assets/files/build.script_x86 -O build
chmod +x build
Let’s install the XPtsp OpenWRT repository keys and package location:
1
2
echo "https://xptsp.github.io/openwrt-repo/apk/aarch64_cortex-a53/packages.adb" >> repositories
wget http://xptsp.github.io/openwrt-repo/apk/aarch64_cortex-a53/xptsp.pem -O keys/xptsp.pem
Setting up History of Images Built
I’ve found this to be useful for myself, in the event that I’ve screwed something up. You can skip making a repository on GitHub (or Gitea or any other Git system) if this doesn’t interest you. It should though….
Let’s start by installing git on your system. I am assuming that you are using a Debian-based OS, so if this isn’t correct, adjust for your OS! (Windows is not supported!)
1
apt install -y git
Additional Scripts
We need to create a file called files_overwrite/etc/uci-defaults/99-custom:
1
2
3
4
5
6
7
8
9
10
11
12
13
14
15
16
17
18
mkdir -p files_overwrite/etc/uci-defaults
cat << EOF > files_overwrite/etc/uci-defaults/99-custom
#!/bin/bash

# Make sure ownership and permissions of tang directory are correct:
chown -R tang:tang /usr/share/tang/db
chmod 0755 /usr/share/tang/db
chmod 0440 /usr/share/tang/db/*

# Make sure dropbear directories permissions are correct:
chmod -R u=rwX,go= /etc/dropbear

# Make sure that SSL certificate directories have correct ownership.
# Otherwise, AGH won't be able to use the SSL certificates:
chown root:adguardhome -R /etc/acme/*/*.key
chmod 0660 /etc/acme/*/*.key
EOF
chmod +x files_overwrite/etc/uci-defaults/99-custom
First Commit
Before we do anything else, let’s create the first commit:
1
2
3
4
5
6
7
ln -sf build_dir/target-aarch64_cortex-a53_musl/linux-mediatek_mt7622/tmp image
mkdir -p build_dir/target-aarch64_cortex-a53_musl/linux-mediatek_mt7622/tmp
touch build_dir/target-aarch64_cortex-a53_musl/linux-mediatek_mt7622/tmp/.hidden
git init
git checkout -b main
git add .
git commit -m "Initial Commit"
Now, this is almost perfect, except there are certain directories that we don’t NEED in the repo. We REALLY don’t need to backup anything in the build_dir and dldirectories. So let’s create a .gitignore file and amend the commit with it:
1
2
3
{ echo "/build_dir"; echo "/dl"; } > .gitignore
git add ./.gitignore
git commit --amend --no-edit
Finally, we can push the commit to the Git repository. I have a Gitea container setup already set up, so I’m going to push it there:
1
2
git remote add origin https://doug:MySuperSecretPassword@gitea.example.com/Doug/Builder-x64.git
git push -u origin main
Now we have a backup, just in case something happens.
Future Commits
Once OpenWrt is installed on the router, then creating a firmware image with our modifications is as easy as executing the following command:
1
./build
The script contacts the OpenWrt installation, gets the sysupgrade backup, unpacks it, applies any files found in the files_overwrite directory, and proceeds to build the firmware image. The resulting image can be flashed from within the LUCI Web UI, or by uploading it to the router and executing sysupgrade <IMAGE>.
Summary
We are ready to start customizing the “factory” OpenWRT image! How exciting!