My Router - Part 1
Beginning the Customization of OpenWrt on my Router!
Let’s Get Started
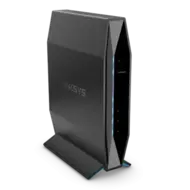
This is a ONE-SIZE FITS MINE documentation! It should be noted that these instructions work for this specific router, and adjustments for other routers should be made.
Okay, I’m going to start listing the basic settings that I feel are a requirement for my router. Please note, any MAC addresses, credentials, and domain names listed are NOT the ones I use, so don’t think I’m handing out the keys to my kingdom. I’m not stoopid…
We need to SSH into our router. Note that these instructions assume an unmodified installation. If you’ve already modified the router IP address, use that instead.
1
ssh root@192.168.1.1
Set the Root password
Setting the root password prevents unauthorized access. I’m going to set my root password to MoeLarryCurly. Obviously, DON’T use this password for your machine.
1
(echo MoeLarryCurly; echo MoeLarryCurly) | passwd
Enable Upgrade Checking
We’re enabling the setting to check for upgrades to the firmware. This should be set to 0 if you don’t want to be reminded that there is an upgrade available. IMHO, I’m trying to stay secure as possible, so it’s always 1 for me:
1
uci set attendedsysupgrade.client.login_check_for_upgrades='1'
2.4GHz Wifi Access Point
Next, we’re configuring my 2.4GHz Wifi access point:
1
2
3
4
5
6
7
8
9
10
11
12
uci -q del wireless.radio0.disabled
uci set wireless.radio0.htmode='HT40'
uci set wireless.radio0.cell_density='0'
uci set wireless.radio0.country='US'
uci set wireless.radio0.channel='6'

uci -q del wireless.default_radio0.disabled
uci set wireless.default_radio0.ssid='Four Stooges'
uci set wireless.default_radio0.encryption='psk-mixed'
uci set wireless.default_radio0.key='MoeLarryCurlyShemp4'
uci set wireless.default_radio0.ocv='0'
uci set wireless.default_radio0.ifname="wlan-24g"
5GHz Wifi Access Point
Can’t forget the 5GHz Wifi access point:
1
2
3
4
5
6
7
8
9
10
11
12
uci -q del wireless.radio1.disabled
uci set wireless.radio1.htmode='VHT20'
uci set wireless.radio1.cell_density='0'
uci set wireless.radio1.country='US'
uci set wireless.radio1.channel='36'

uci -q del wireless.default_radio1.disabled
uci set wireless.default_radio1.ssid='Four Stooges 5GHz'
uci set wireless.default_radio1.encryption='sae'
uci set wireless.default_radio1.key='MoeLarryCurlyShemp4'
uci set wireless.default_radio1.ocv='0'
uci set wireless.default_radio1.ifname="wlan-5g"
Router IP Address
We’re changing the default router address to 192.168.20.1. This should help prevent expected future conflicts with our planned VPN on other networks:
1
2
3
4
5
uci -q del dhcp.lan.ra_slaac
uci set dhcp.lan.ra_preference='medium'
uci del network.lan.ipaddr
uci add_list network.lan.ipaddr='192.168.20.1/24'
uci set network.lan.multipath='off'
Static IP Assignments
Gotta add our static IP assignments, so that my equipment ends up where I expect them to be. And no, these are NOT my machine names! (Notice a theme?) I consider this to be part of a customized “basic” router setup, as I don’t want to waste time trying to figure out where services actually are instead of where I wanted them to be.
1
2
3
4
5
6
7
8
9
10
11
12
13
14
15
16
17
18
19
20
21
22
23
uci set dhcp.moe_pc=host
uci set dhcp.moe_pc.name='Moe'
uci set dhcp.moe_pc.dns='1'
uci set dhcp.moe_pc.ip='192.168.20.100'
uci set dhcp.moe_pc.mac='F2:B0:C4:87:4A:13'

uci set dhcp.larry_pc=host
uci set dhcp.larry_pc.name='Larry'
uci set dhcp.larry_pc.dns='1'
uci set dhcp.larry_pc.mac='12:BE:29:E0:97:CC'
uci set dhcp.larry_pc.ip='192.168.20.101'

uci set dhcp.curly_pc=host
uci set dhcp.curly_pc.name='Curly'
uci set dhcp.curly_pc.dns='1'
uci set dhcp.curly_pc.mac='CA:70:26:36:EF:31'
uci set dhcp.curly_pc.ip='192.168.20.102'

uci set dhcp.shemp_pc=host
uci set dhcp.shemp_pc.name='Shemp'
uci set dhcp.shemp_pc.dns='1'
uci set dhcp.shemp_pc.mac='66:1C:C8:CC:AD:43'
uci set dhcp.shemp_pc.ip='192.168.20.103'
Set DNS Provider to CloudFlare
We’re changing my router’s IPv4 and IPv6 DNS providers to CloudFlare:
1
2
3
4
5
6
7
8
9
uci set network.wan.peerdns="0"
uci -q delete network.wan.dns
uci add_list network.wan.dns="1.1.1.1"
uci add_list network.wan.dns="1.0.0.1"

uci set network.wan6.peerdns="0"
uci -q delete network.wan6.dns
uci add_list network.wan6.dns="2606:4700:4700::1111"
uci add_list network.wan6.dns="2606:4700:4700::1001"
LAN Routes for IoT IP Ranges
Computer Larry is a Raspberry Pi with 2 access points. Since they are not a part of the planned network for THIS router, we have to add routing for those devices so I can access them from my main machine:
1
2
3
4
5
6
7
8
9
uci add network route
uci set network.@route[-1].interface='lan'
uci set network.@route[-1].target='192.168.4.0/24'
uci set network.@route[-1].gateway='192.168.20.101'

uci add network route
uci set network.@route[-1].interface='lan'
uci set network.@route[-1].target='192.168.5.0/24'
uci set network.@route[-1].gateway='192.168.20.101'
Without the masquerade setting for the lan zone, any attempt to access these IP addresses will fail. We need to enable the masquerade setting for the lan zone. I also want to name the lan and wan zones in the network configuration for easy of reference.
1
2
3
uci set network.@zone[0]='lan'
uci set network.@zone[1]='wan'
uci set network.lan.masq=1
Other Small Settings
We need to enable dropping invalid packets and enable software and hardware flow offloading:
1
2
3
uci set firewall.@defaults[0].drop_invalid='1'
uci set firewall.@defaults[0].flow_offloading='1'
uci set firewall.@defaults[0].flow_offloading_hw='1'
We need to disable binding dnsmasq’s DNS to interfaces and fix race condition for DHCP.
1
2
uci set dhcp.@dnsmasq[0].nonwildcard='0'
uci set dhcp.lan.force="1"
We need to commit these changes now, but we’re not going to reboot the router yet:
1
uci commit
Bash
We need a better shell than what busybox offers, so we’re going to install bash, change the default shell for root, then upgrade wget to the full version that supports HTTPS. We also need to download the bash initialization script, which has a dos-equivalant cls command using the built-in clear command:
1
2
3
4
5
6
7
8
9
10
# Install bash, change default shell
apk update
apk add bash wget-ssl
sed -i "s|/bin/ash|/bin/bash|g" /etc/passwd

# Download bash startup script:
FILE=/root/.shinit
wget https://xptsp.github.io/assets/files/bashrc.sh -O ${FILE}
chmod +x ${FILE}
echo "${FILE}" >> /etc/sysupgrade.conf
Universal Plug-And-Play (uPnP)
We also want uPnP services installed on this router:
1
2
3
4
apk add luci-app-upnp
uci set upnpd.config.enabled="1"
uci commit
service miniupnpd restart
Reboot!
Okay, now we’re ready to reboot the router….
1
reboot
Summary
What we’ve configured is is an acceptable factory-equivant router, sans possible USB support (unknown if factory firmware has this). This is okay, but I know we can do better than factory-equivant router firmware! After all, we installed OpenWRT!!!
Once the router has rebooted, the new IP address is 192.168.20.1…
We have more stuff we can install! Onwards!